UPDATE!! By far, the most exciting thing that's happened to me due to the launching of this website has been the following e-mail that I received on February 21, 2006. It was from Larry Yaeger, one of the principle authors of the rendering software that made the CG Gunstar's flight into cinematic history possible. You can even see him in the Special Features on the DVD for the film!
Greetings Starfighter - Having worked on the computer graphics for The Last Starfighter, I just had to write and say how amazingly cool your LEGO Gunstar is! That was obviously a labor of love. Someone just sent me a link to your web site today, and I got a real kick out of it.
It's all cool, but I especially love the fact that the doors upon up to reveal the deathblossom configuration. There were an awful lot of polygons in the original model when we showed the ship in that configuration... took a long time to render even on a Cray X-MP. (Of course, we simply left all those internal polygons out when the doors were closed.) The attention to detail for the Grig character was also pretty amazing.
You might enjoy this small collection of images I put up on the web from my days at Digital Productions. Somewhere I've got an image of a glass Gunstar that I'll have to put up there.
Heh. Would you mind if I put one of your LEGO Gunstar images up there, just for fun?
Anyhow, great job!
All the best - larryy
Oh my gawd!! For a Star Trek fan, this would be similar to getting kudos from Matt Jeffries! As Linda Richmond from Coffee Talk would say "I can die now, I can die now!!" Now that I've gushed appropriately, on to the pictures!
It took me about a month to get all the modules built (wings, engines, fuselage, wing plating, stand, etc) before I could put it all together. A few more weeks of tinkering and I arrived at a version that I think is fairly accurate. The wings were the most challenging aspect of the design to replicate, especially since they are pretty complex structures that make up at least half the total volume of the ship.
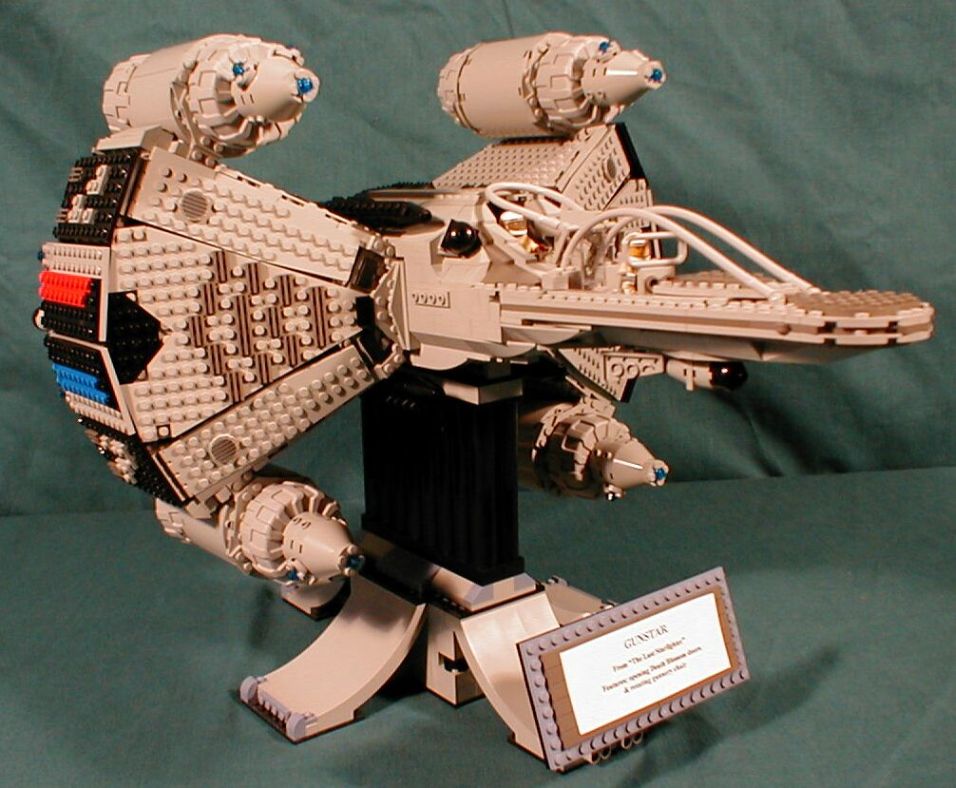
After I had the entire ship together, it was much easier to make changes so that everything would be properly proportional.

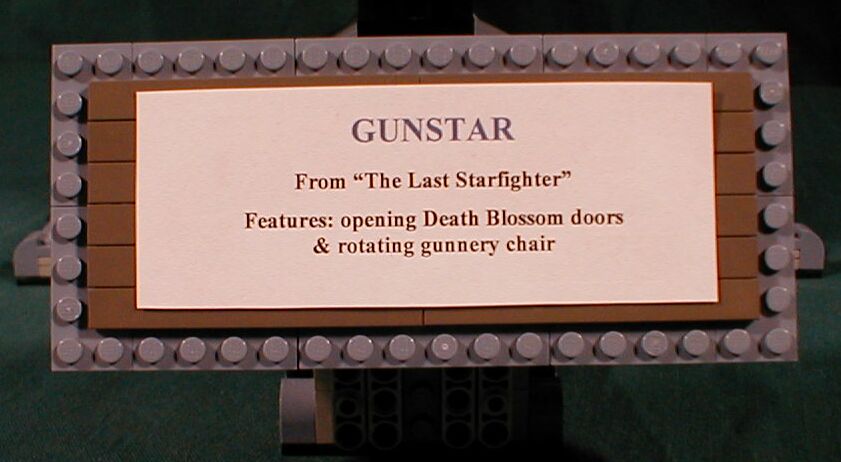
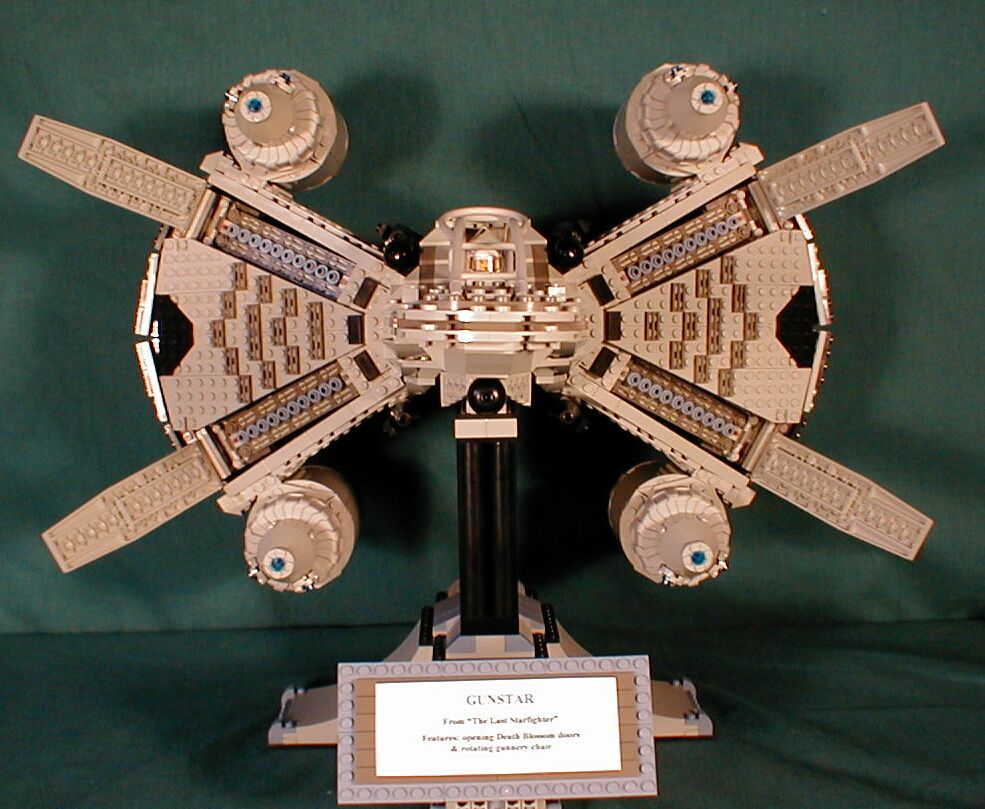
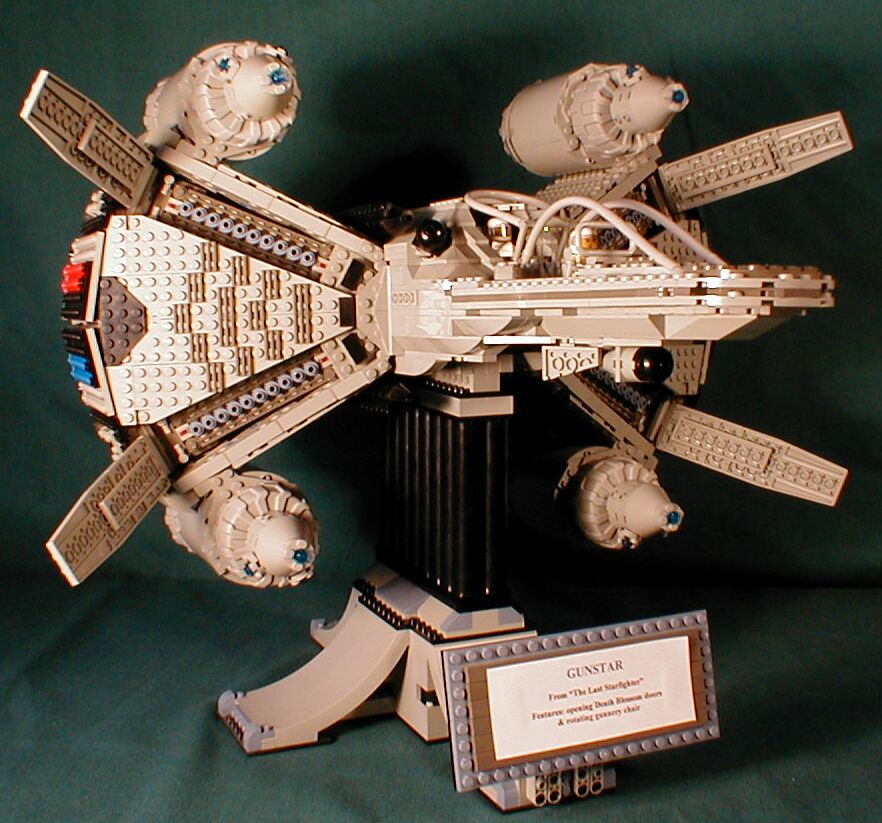
Since the model is similar in scale and detail to the Lego Ultimate Collectors series, I thought it would be fun to create a stand with a sign listing vital statistics. It also saves me from having to answer the same question over and over when our Baylug meetings are opened to the public!
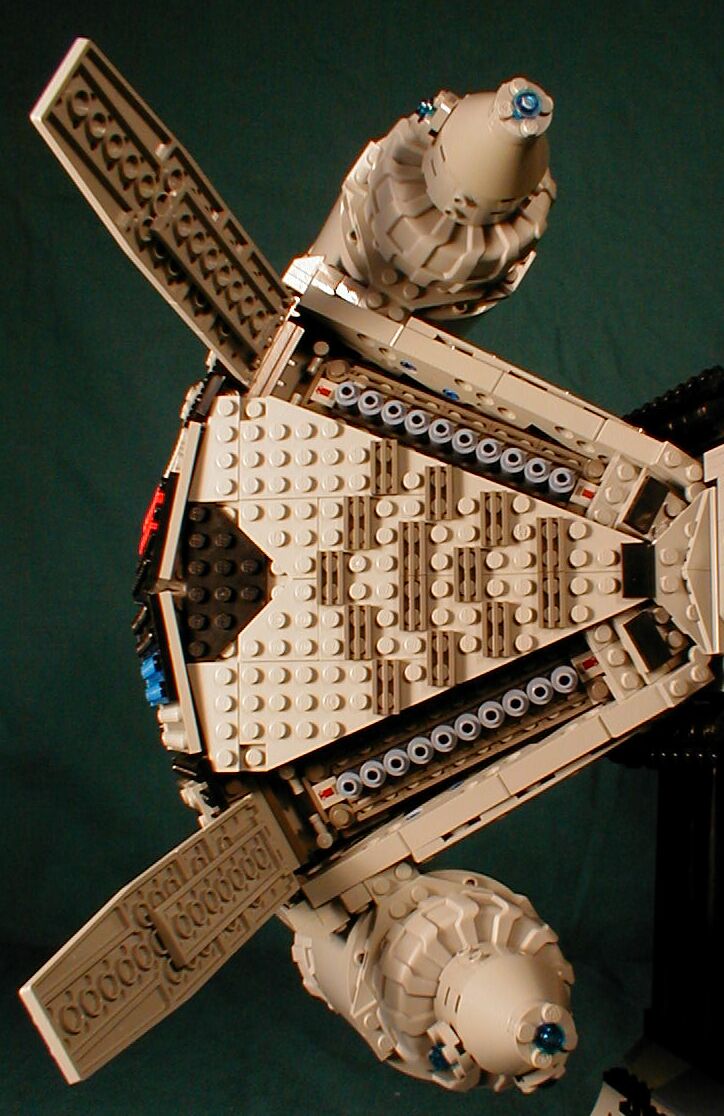
The construction and detailing of the wing plating was a long process, especially the triangular taper of the rear sections. Below I've included a few of the great renders done by Fabio Passaro at Meshweaver so that you can compare them to the actual model just as I did while I was working on it. Click the Portfolio link and then Hobby Work to find the pics, they're quite spectacular and there are a few that I didn't present here that you'll want to see!
The Rylan logo or squadron logo came out pretty well, but I couldn't think of any piece that would capture the white star shooting down the middle and I also didn't want to stack plates too high.
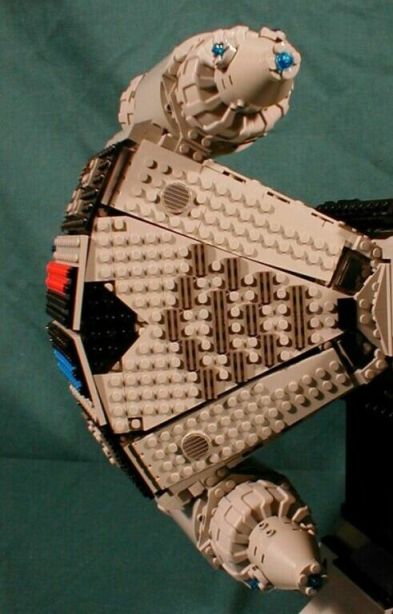
The one aspect of the ship design that I wasn't able to translate was the rear curvature of the base of the wings after they leave the fuselage. As you can see, that part is straight on my model. I had to have the Technic beams run the full length of the wings to support the weight.
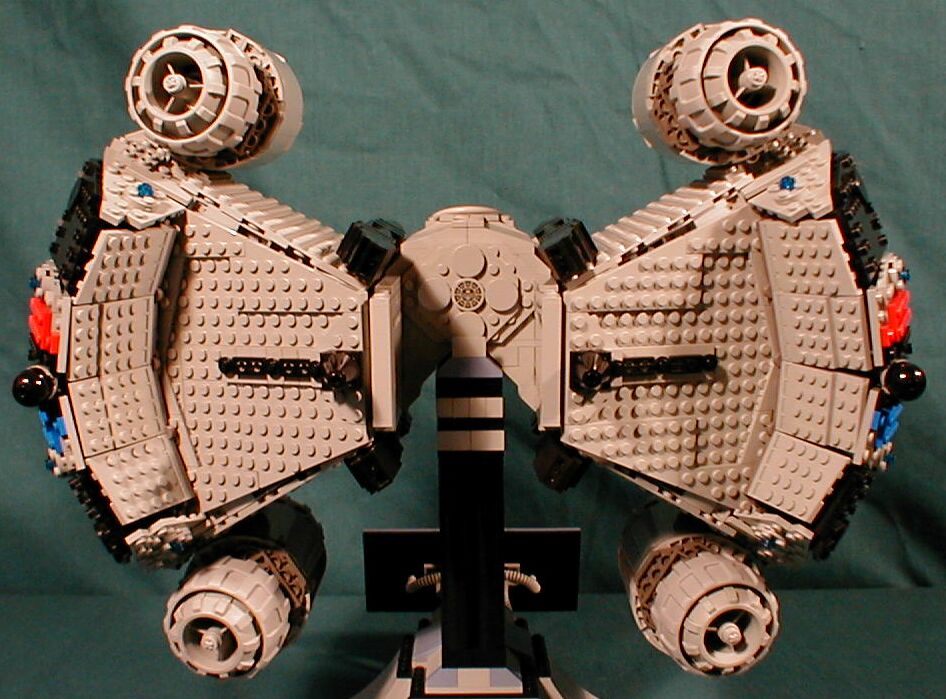
The triangular taper at the rear of the wings was a daunting task, but hinge plates came to the rescue in every situation! The rearward gun turret is suspended between the angled plates on a Technic axle.
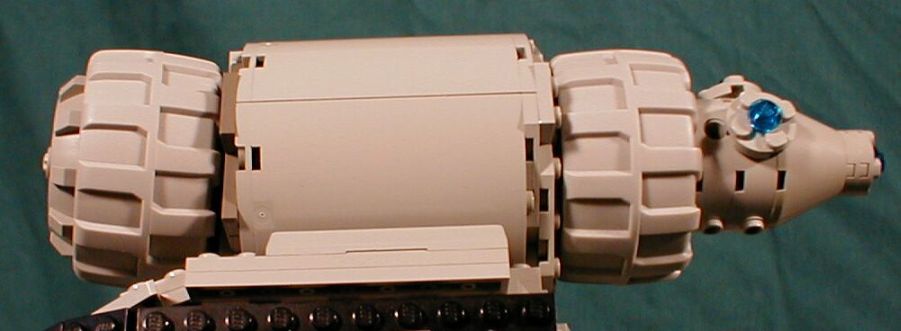
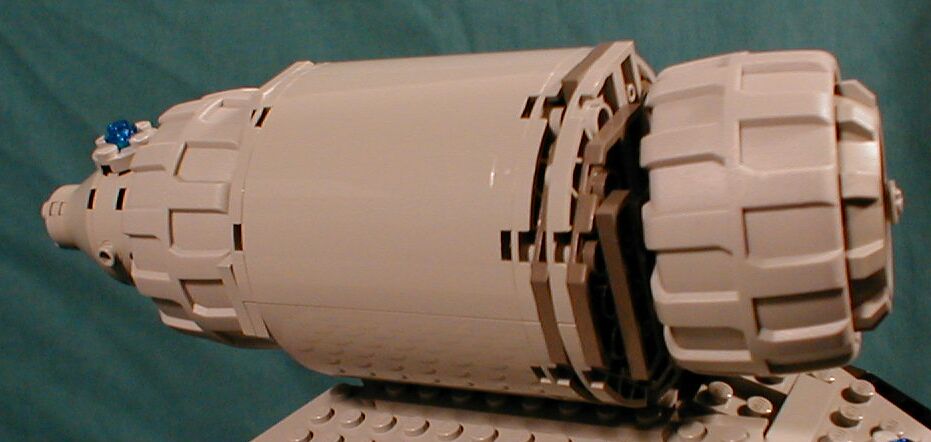
It took awhile before I could figure out how to get the angle of the rear sections of the engines, but I think they came out pretty good. Those big gray wheels were a lifesaver!
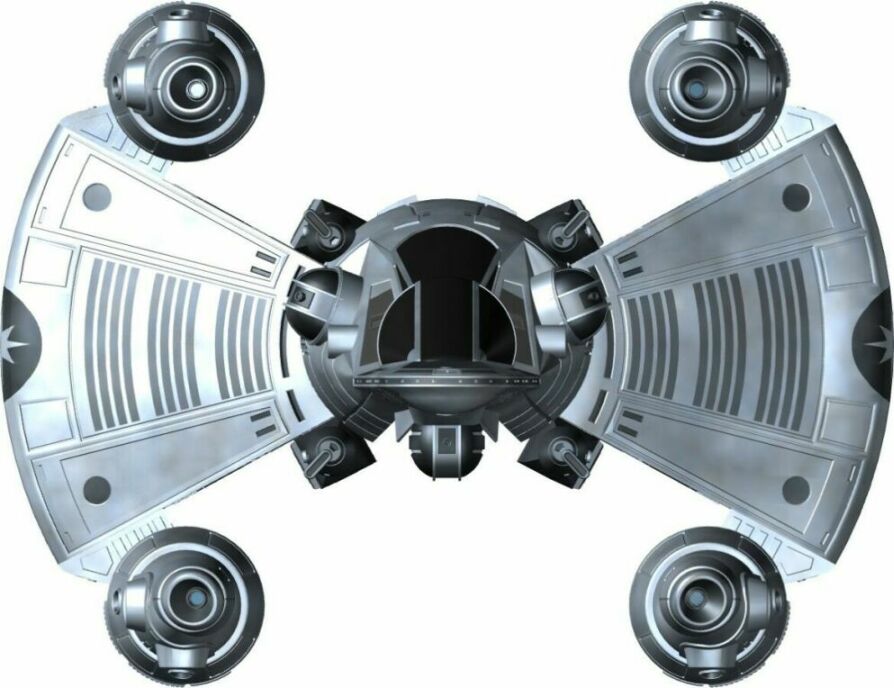
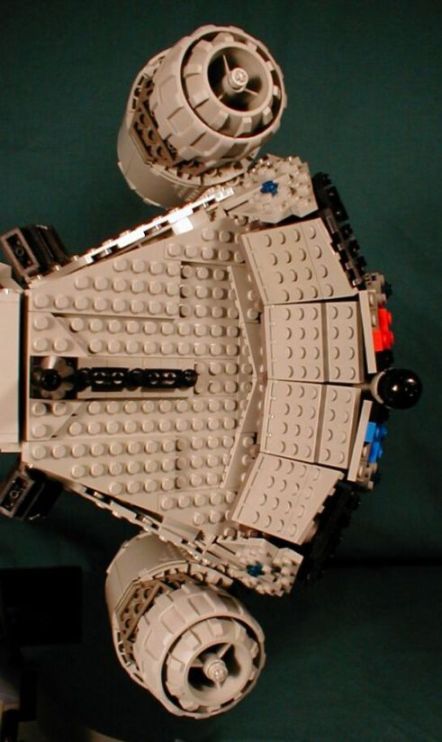
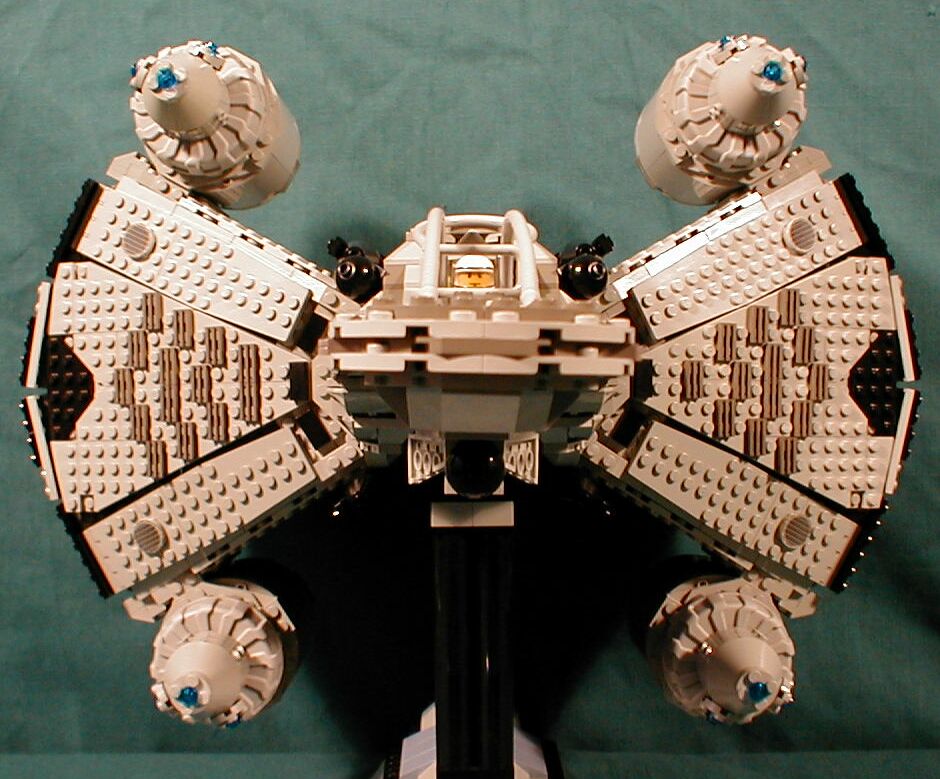
A nice head-on comparison.
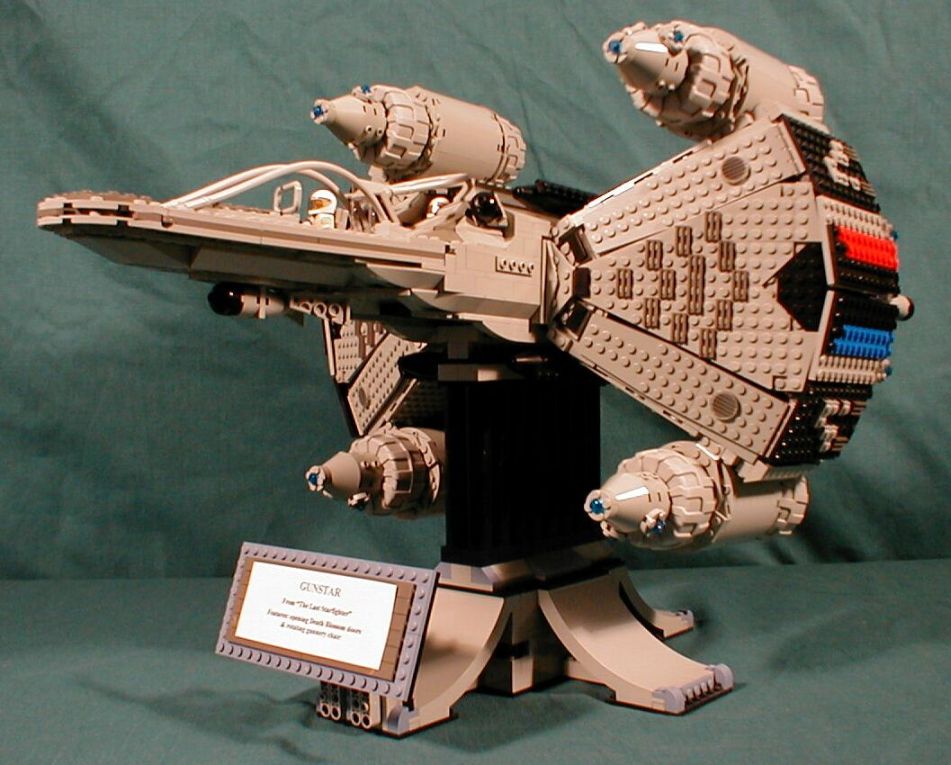
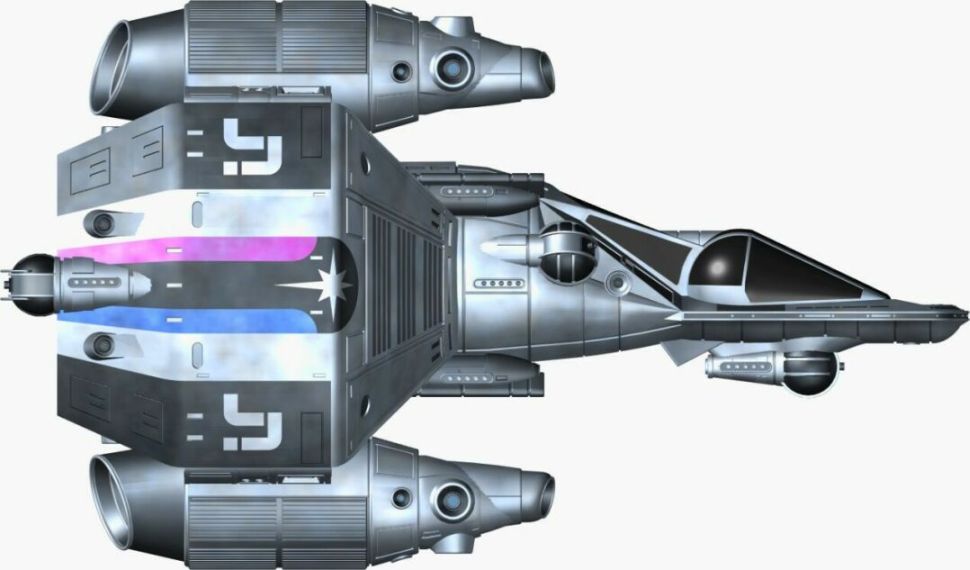
"Careful, careful! That's Death Blossom, a weapon of last resort!"
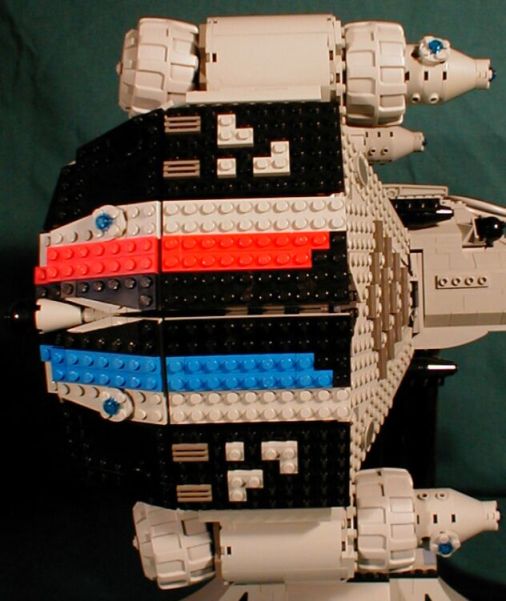
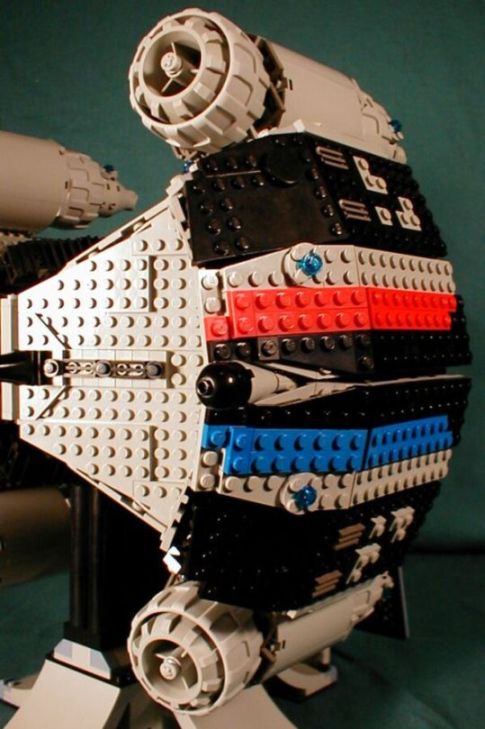
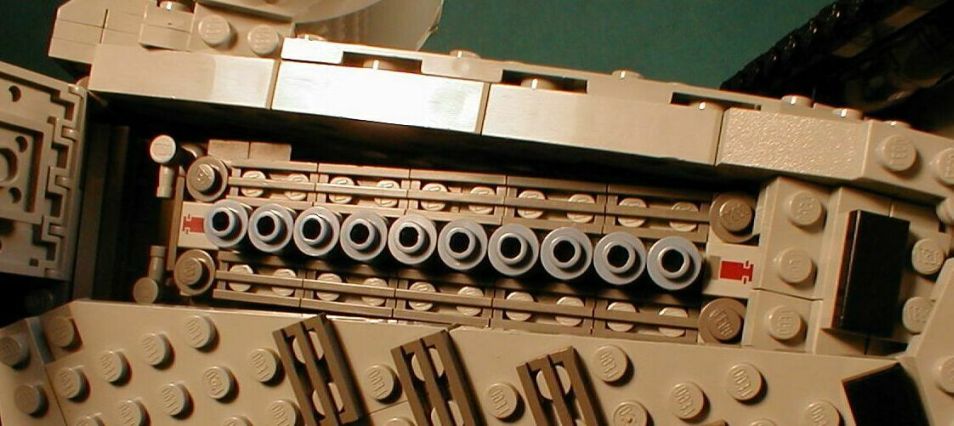
The sand blue cylinders and dark gray grill tiles make a nice color contrast for the Death Blossom bays.
Here's a closer look at the Death Blossom bays. The 1x1 decorated tile from the nose of the MINI snowspeeder fit just right at the ends. When I first installed the bays, the top ones drooped from their own weight so I had to redesign the base of the wing (the narrower part on the right side of the picture) so that they would be held in place.
A nice close-up of the Death Blossom. It's amazing how much light you can blast at a model yet the photo makes it seem like you're shooting by candlelight!
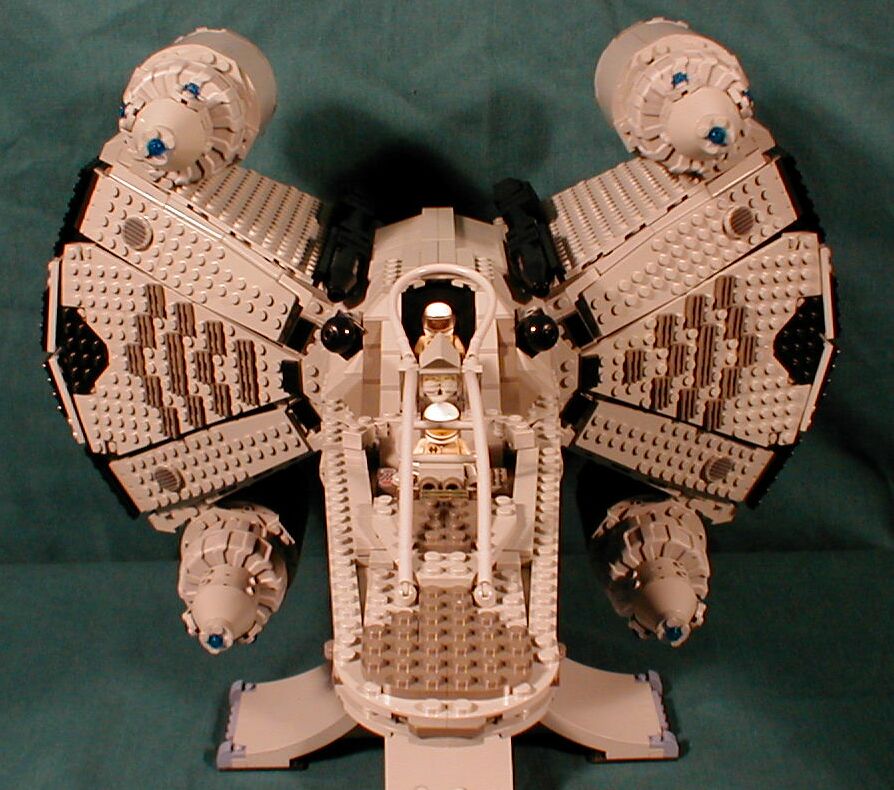
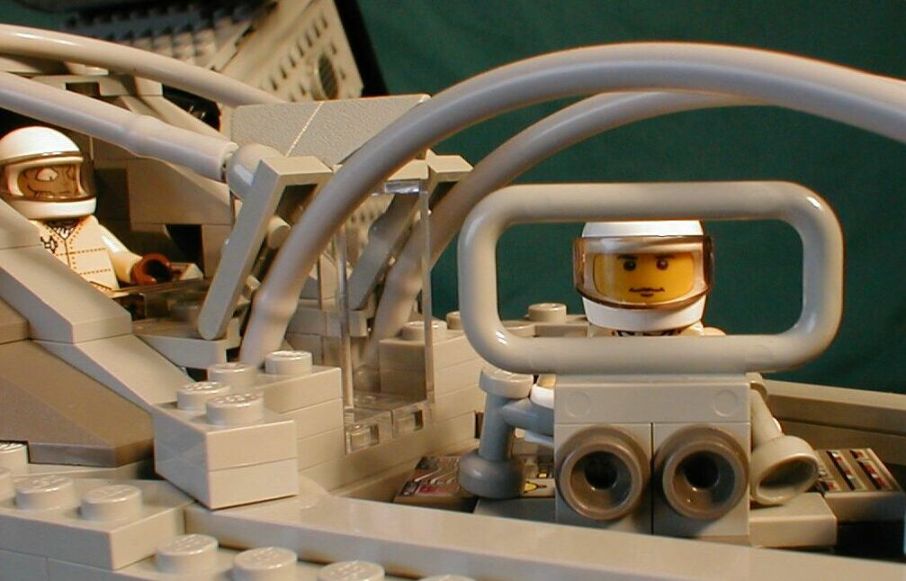
The cockpit went through six or seven versions before this one. I was totally jazzed when I seized upon the idea of using the pnuematic tubing for the cockpit lines. Pnuematic tubes fit snugly over the ball at the end of those little control sticks. Then, not only can they be snapped on like bricks at the ends, but the control stick gives you a wide range of positions.
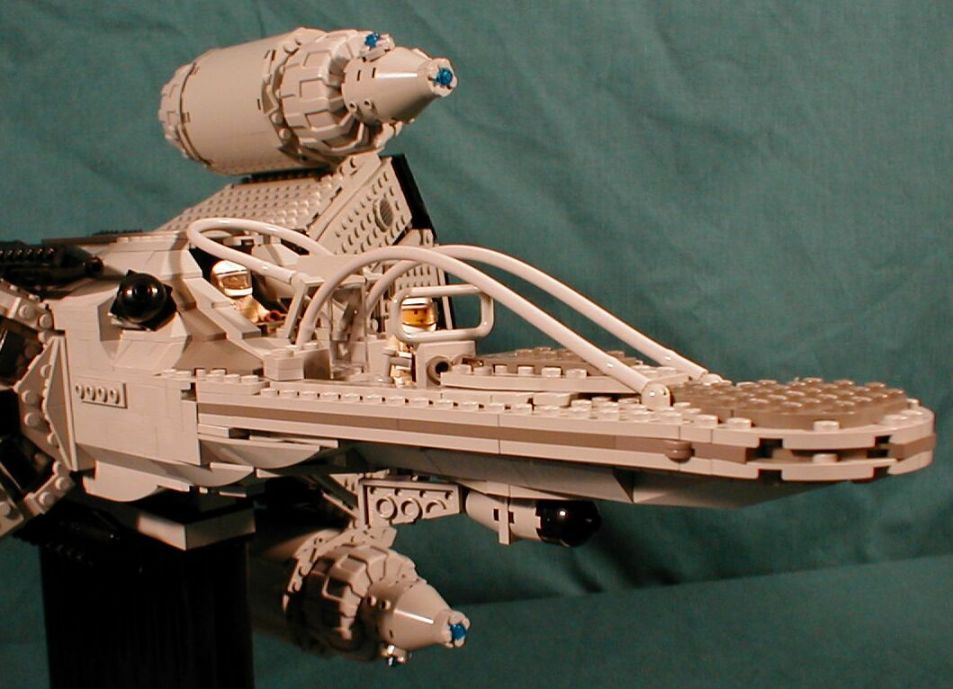
The custom minifigs were pretty simple. I knew I wanted to use the Hoth Rebel soldier torso from the Snowspeeder set because it's a good match to the Starfighter uniform. As for the characters, Professor Quirrel's face was a good match for Alex. However, Grig's alien head was gonna be tough. I eventually settled upon the hidden chameleon face of the Zam Wesell 'fig from the Star Wars: Episode II Bounty Hunter Pursuit set. The trans-smoke visors from the Racers sets helped to darken Grig's face to more closely match his brown hands.
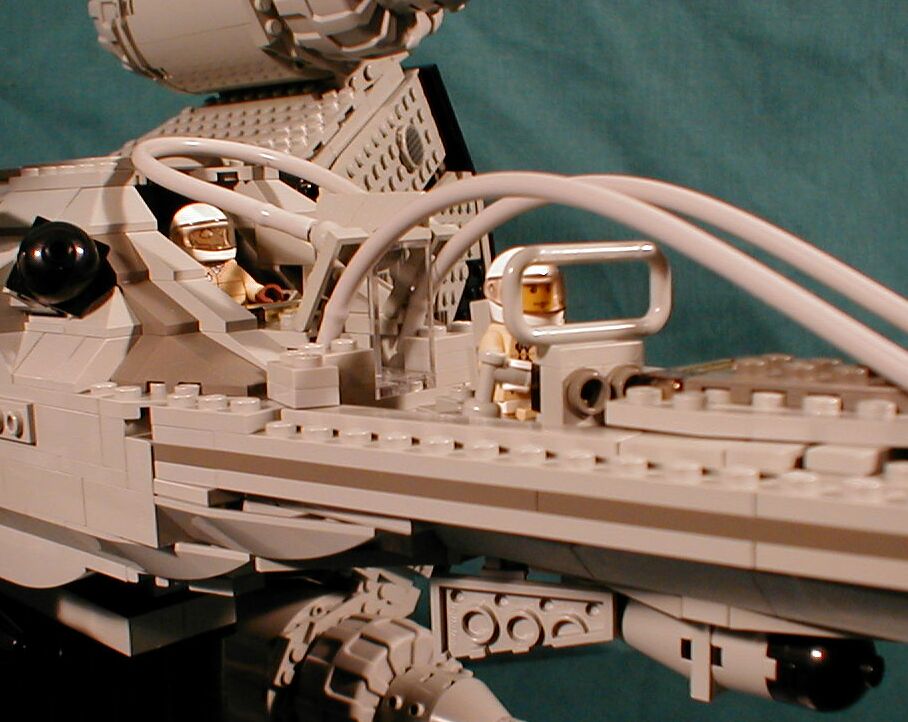
The trans-clear thin-walls were perfect for adding a cockpit detail on the top without adding solid walls underneath.
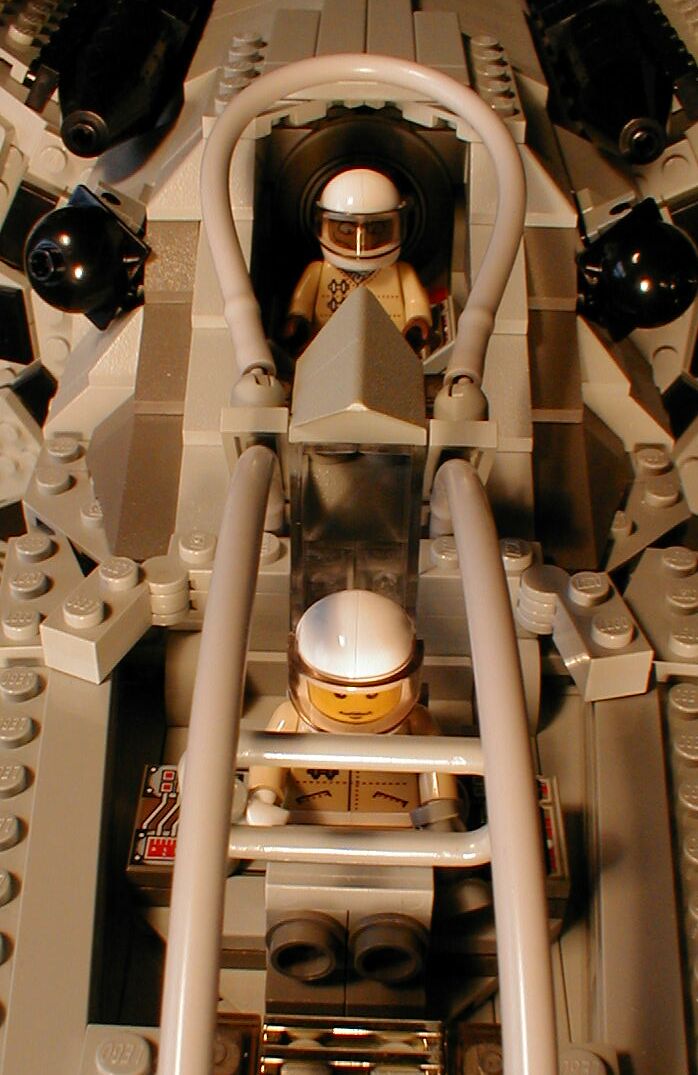
Even with dual 500 watt lamps, I still had a hard time getting a well lit shot of Grig's station. The decorated 4x4 saucer from the AT-TE makes a good access door. You also have a better look at how the visor helps Grig's face match his hands.
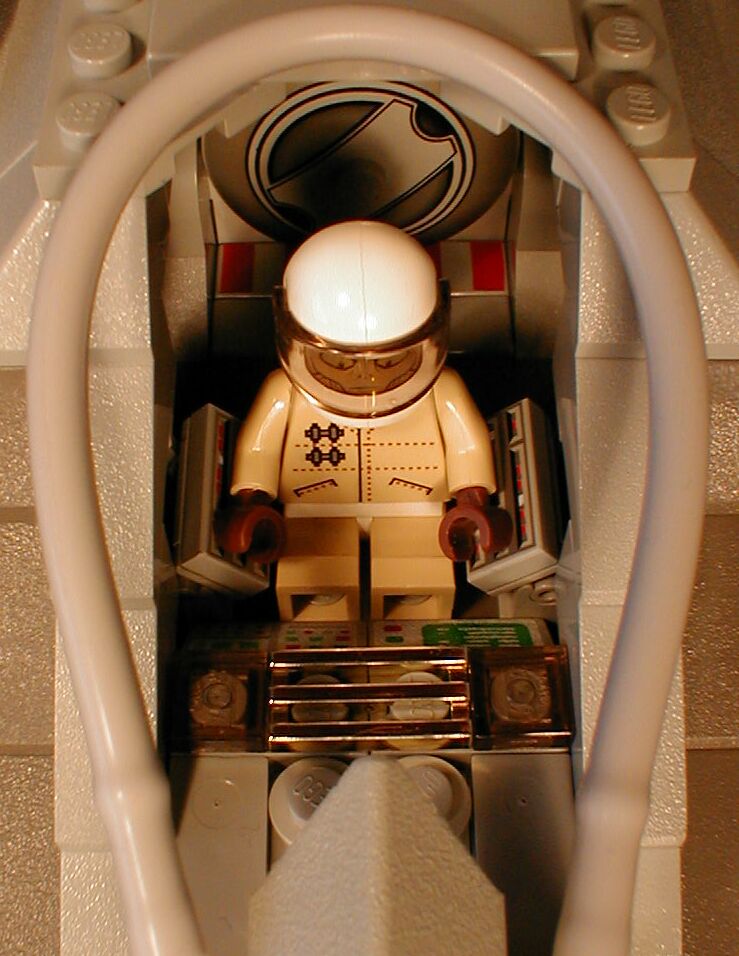
Alex's gunnery chair moves in all three axis in the film, but at this scale I had to settle for one. Here you can see how he's holding the spigot pieces in different ways to simulate the two different control sticks; one for tracking and one for weapon selection. The gray piece for the HUD (Heads Up Display) came from Studio set #1361 Camera Car.