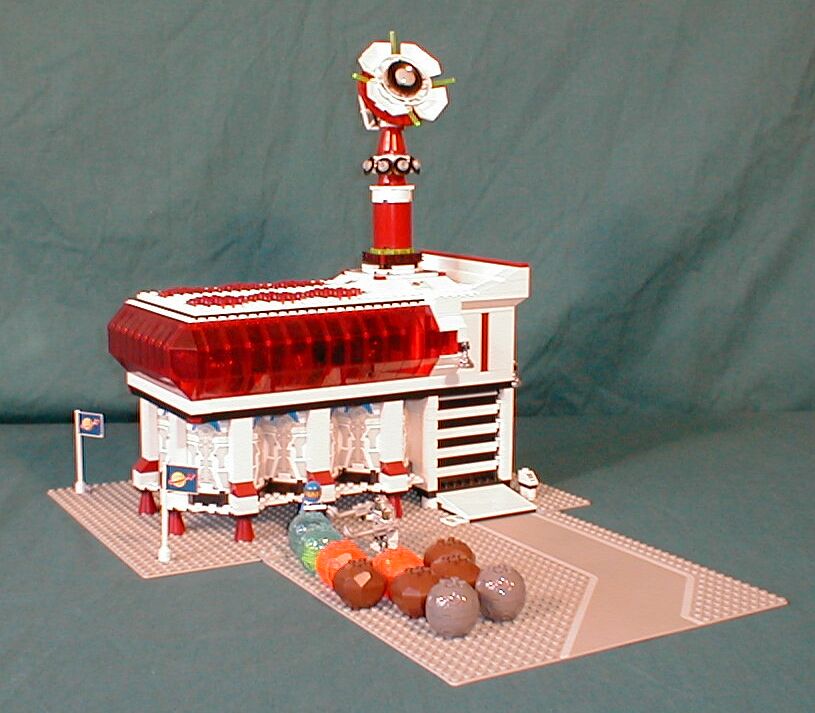
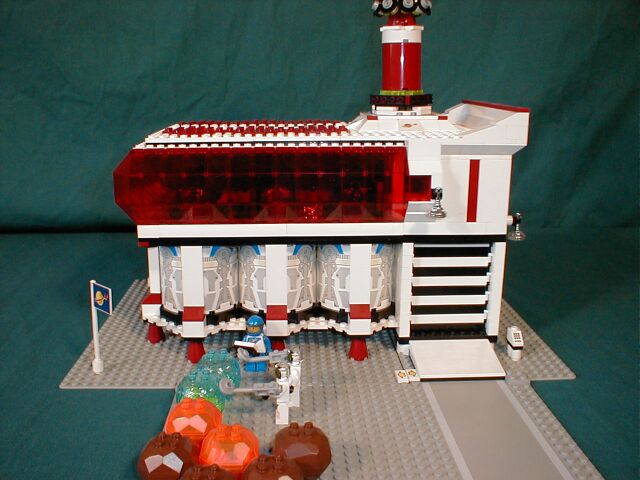
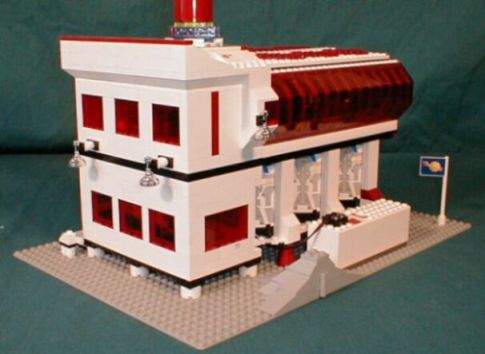
The uber-set for the theme. I went completely overboard here in terms of piece count for a set this size, but what the heck, I'd buy it if I saw it on the store shelves! Just like in the Control Tower, I used the Star Wars Escape Pod decorated walls to suggest giant power cells. This building is where all the excavated meteors/asteroids are brought so that they can be scanned for useable minerals/gems/ore.
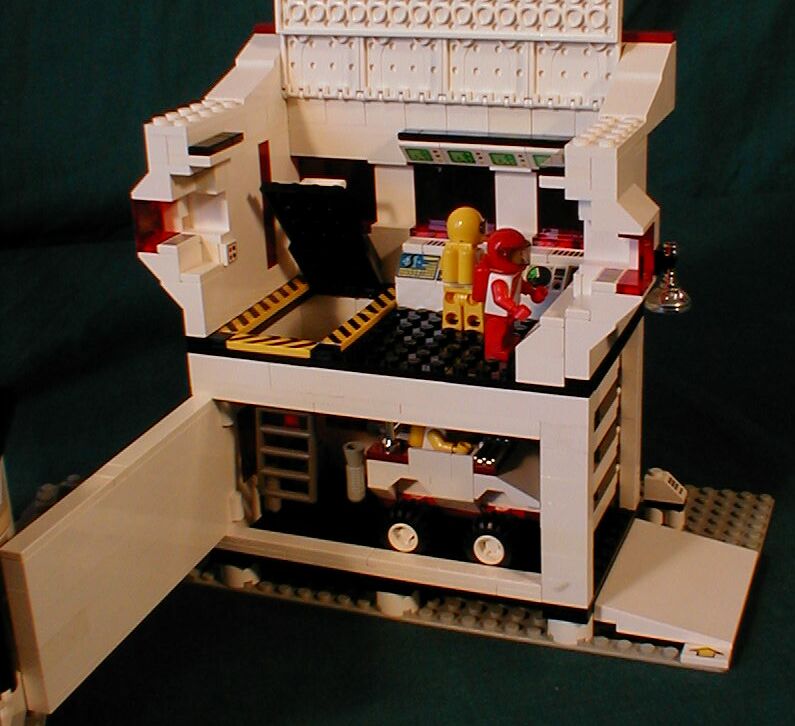
As the largest set, I wanted it to have the most potential play value, and from the very start I strove to make the building open up as much as possible using hinge bricks and plates to ensure complete access to every part of the interior, which is a staple feature of all large-scale Lego buildings.
In this and the following two photos you can see why the set is called Base I. Having only two 1x1x5 super-tall bricks in dark red (from # 4482 AT-TE), I hit upon the idea of using them as a large ID number on both sides of the building. I really like the stripped-down, vertical simplicity of this and it helps to break up the one large white space on the top floor without adding more windows (which I already had plenty of).
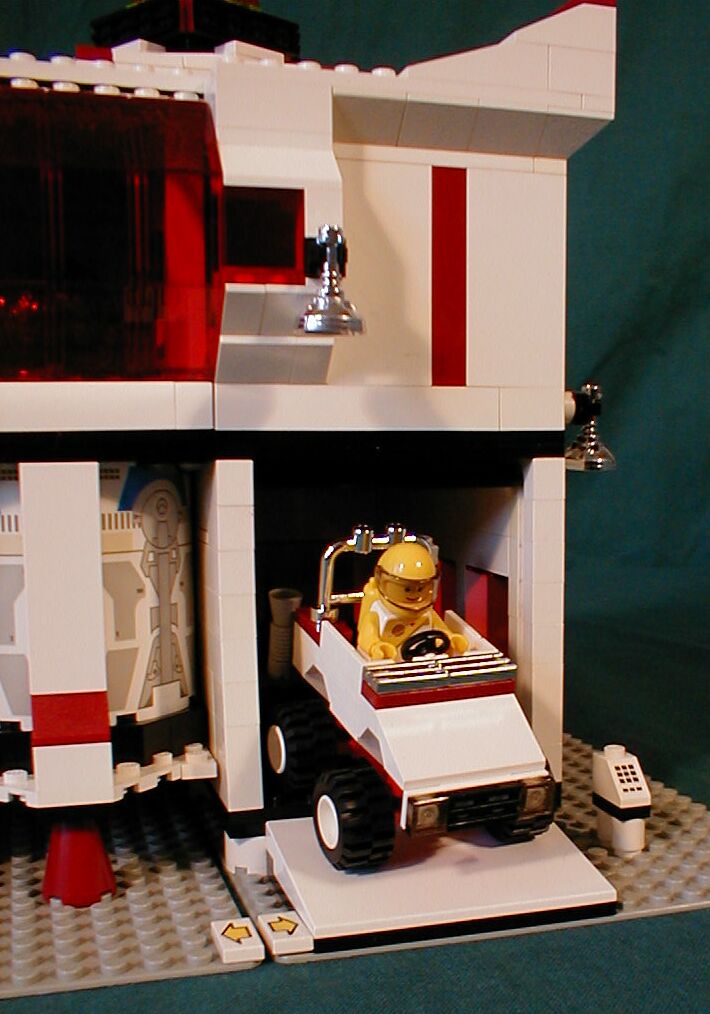
Every base has to have a jeep, and every jeep has to have a garage! I've a pretty good stock of garage door pieces, and the black and white striped door helps to echo the overall design of the building.

This particular jeep sports a snazzy chrome rollbar and as well as those spring-cushioned wheels.
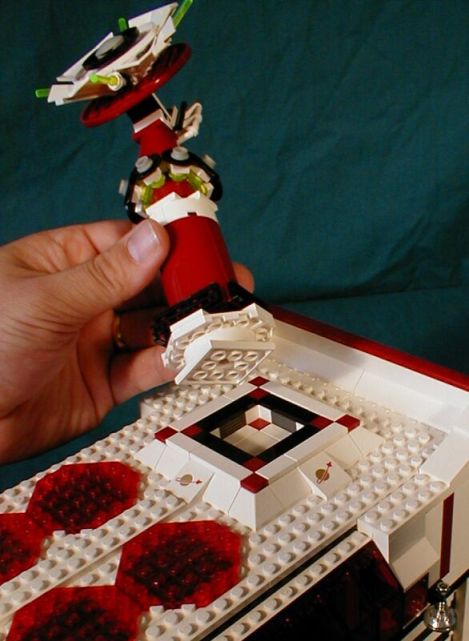
The radar tower on top is not a local scanner, but a transmitter to convey research data. Initially, when the roof was opened, the tower made the roof section too top-heavy, so I had to make it removeable.
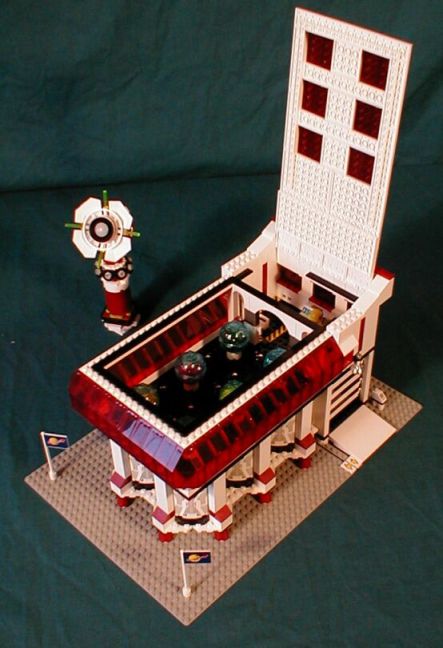
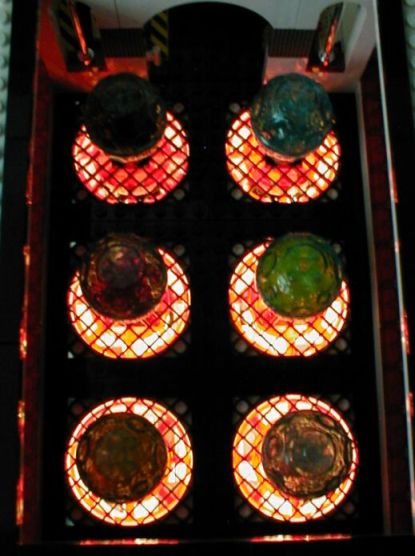
Once the roof is open, you can see the six scanning platforms and the adjacent lab with its banks of computers. To the left of the lab you can see the floor hatch that leads to the garage below. I also made the three-sided bank of windows removeable for easy access to the scanning floor and the lab.
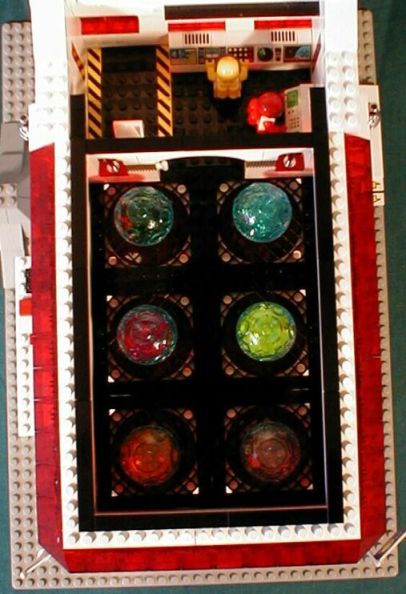
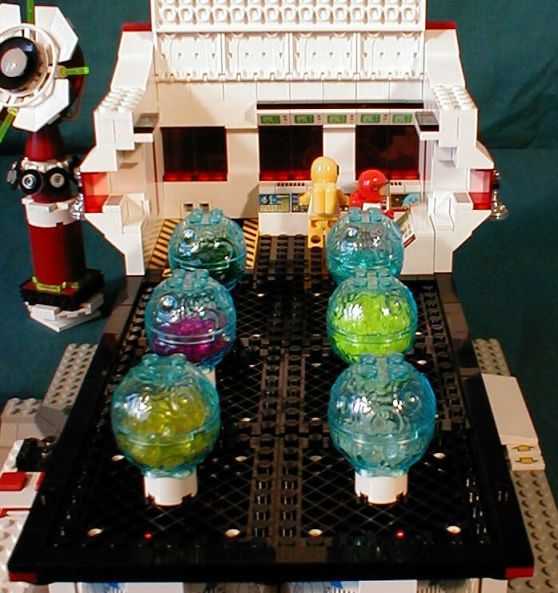
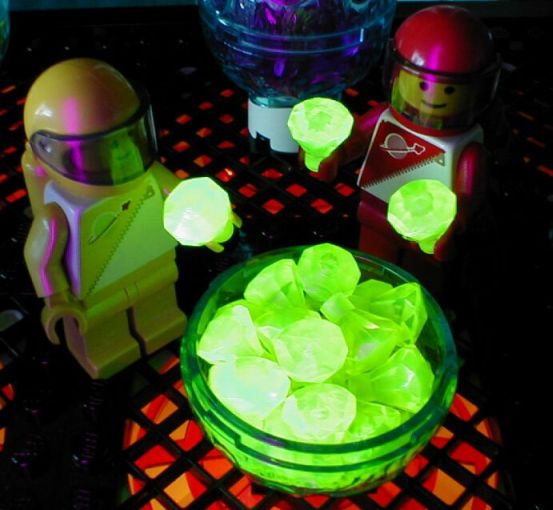
Each meteor/asteroid is filled with trans-jewels in different colors and I used most of the ones I have.

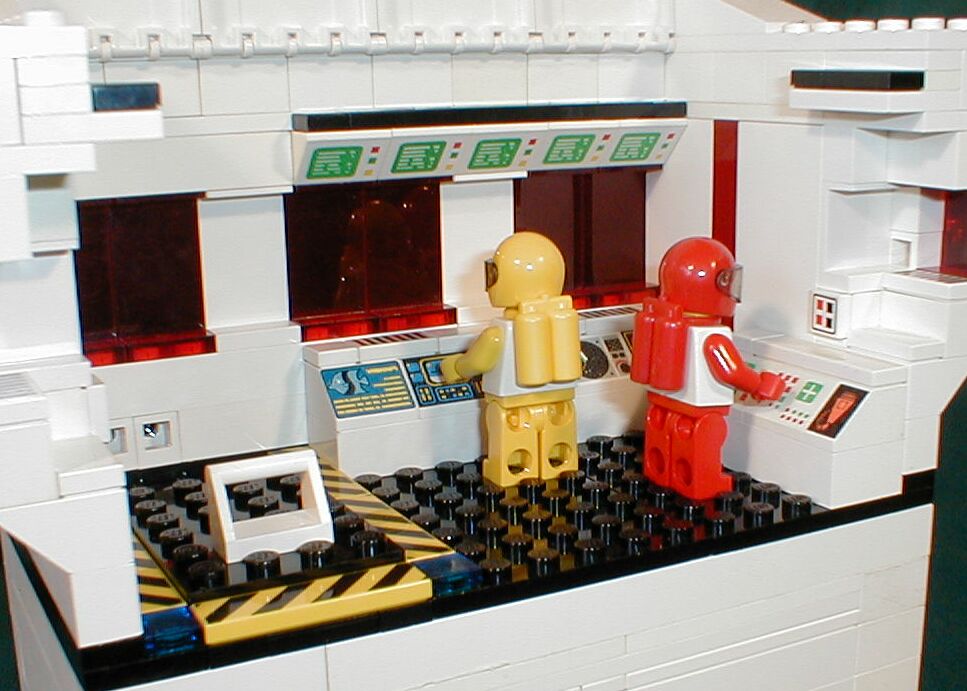
Here's a nice close-up of the lab and its two technicians. You also have a better view of the floor hatch whose visual design I tried to echo in the hatch on the Control Tower.
This shot's a little dark, but it shows how the building is actually two pieces on two separate baseplates. These two pieces are held together by the roof when it's closed. The baseplates are hinged together by a rock formation that is hidden in this picture behind the wall that opens to provide more complete access to the garage.
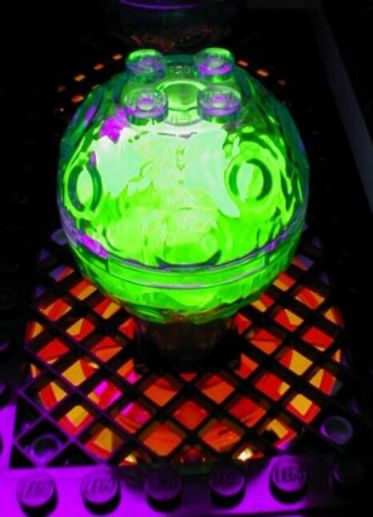
Now, I am a total illumination junkie when it comes to models, and I'd always wanted to have a bunch of those 8x8 grill plates lit from underneath, and the lab seemed like the perfect place to attempt it. I used nearly all of my 9v 1x2 and 1x4 light bricks here to simulate the scanning equipment doing it's thing.
I'd originally used the 2x4x5 half-cylinders in trans-red (from # 6776 Ogel Control Center) but they were too dark to photographed easily. The trans-light blue boulders from the Arctic sets were more appropriate and looked much better when filled with jewels and lit from below with pulsating light.
The addition of a blacklight also provided an extra kick when focused on the trans-antifreeze jewels.
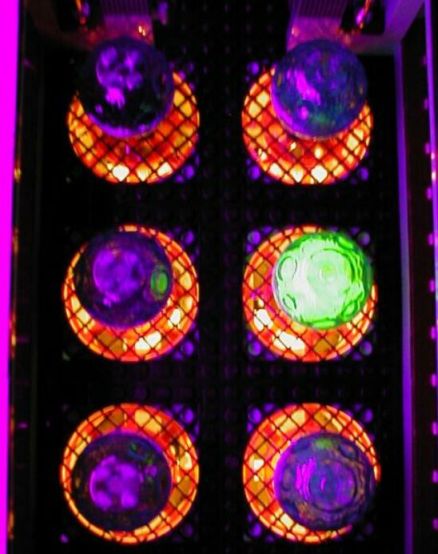
Ah-ha! This particular sample contains Sparklius Plentius crystals! Not only are they excellent for focusing and enhancing laser beams, but they also happen to look stunning in a platinum setting on the gloved finger of your best spacegirlfriend!